Use the API Reference
This is a general explanation of how to use our API Reference and make your first steps with our APIs.
We strongly suggest using the API Reference before trying to implement it in your code. In this way, you'll learn how a valid request must be built, making it easier to write correct code with our SDKs or an HTTP client.
🧹 Let's do our housework first
The API Reference's main objective is to show you how the different parts of the API requests must be defined to obtain a proper response. Since our API respects the REST Architectural Style, we suggest you check the dedicated page first if you don't know what we're talking about, and maybe also check out the Additional Resources on that page, to discover more about the HTTP protocol.
Additionally, we suggest you check our pages dedicated to OAuth 2.0 and the authentication methods supported by the Fatture in Cloud APIs.
👮 Set the token
To be able to use both of these methods, you first need to create an App on the Fatture in Cloud page!!!
To make test calls using the API Reference you must set an Access Token in the dedicated section, to do so you have two options:
-
OAuth (OAuth2AuthenticationCodeFlow): In this case, you'll perform the OAuth2.0 Authorization Code Flow directly inside our API reference, without having to write a single line of code beforehand. Since the OAuth2.0 tool requires some additional configuration, we created a dedicated section to describe it in a detailed way.
-
HTTP Bearer: You can use this option to test a token you retrieved in other ways. For example, you could insert the Manual Token you obtained from the Fatture in Cloud page, or you could try to implement an OAuth2 flow and then test the retrieved token. In this case, you must insert the Access Token directly in the text box. Please, note that the tool will add the "Bearer" prefix for you, so you must not add it.


🔒 OAuth2.0 on the API Reference
To use the OAuth2 option, you must follow these instructions:
- First, be sure to create an app as described here
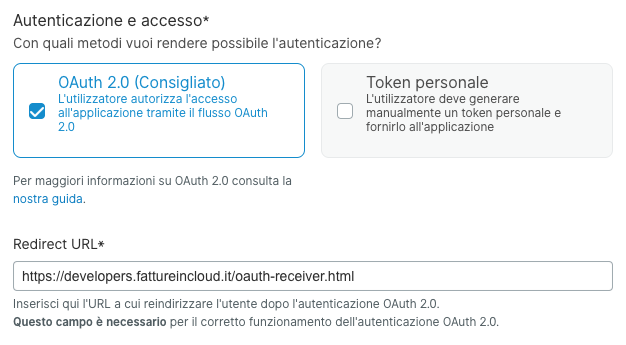
- On your App config, select "Oauth 2.0" as the Authentication method, and insert the following URL as the Redirect URL:
https://developers.fattureincloud.it/oauth-receiver.html
- From the same page, retrieve the Client Credentials (Client ID and Client Secret)
- On the API Reference, select the Scopes required for your tests
- If not selected, select "Send Proof Key for Code Exchange (PKCE)"
- Insert the Client ID and Client Secret in the dedicated inputs


- Check that "Request Body" is selected
- Click the "GET TOKEN" button
This value of the API Reference is related just to this use case! When you use another tool, such as Postman or your own code, you'll need to use a URL valid for that specific environment.
📞 Call the method
Once the access token has been set you can make all the calls you want according to the scopes you specified when creating the access token.
When you have identified the method you need to accomplish the wanted action, you can just scroll down to the method section and then fill in the request as explained in the next paragraphs.
🛣 Path Parameters
Most of our methods require some Path Parameters, e.g. the parameters that must be inserted as part of the URL that must be contacted by the REST call. The parameters marked with <span style={{color: "red"}}>* are mandatory but sometimes you can also find optional ones, in most cases the only one required is the company_id, if you don't know your company's identifier you can just retrieve it using the List User Companies method.


🔍 Query String Parameters
When you are making a GET call you will also have the possibility to set some Query String Parameters. These parameters must be defined at the end of the URL and make it possible to define some additional parameters to the request. Most of these kind of parameters are explained here.


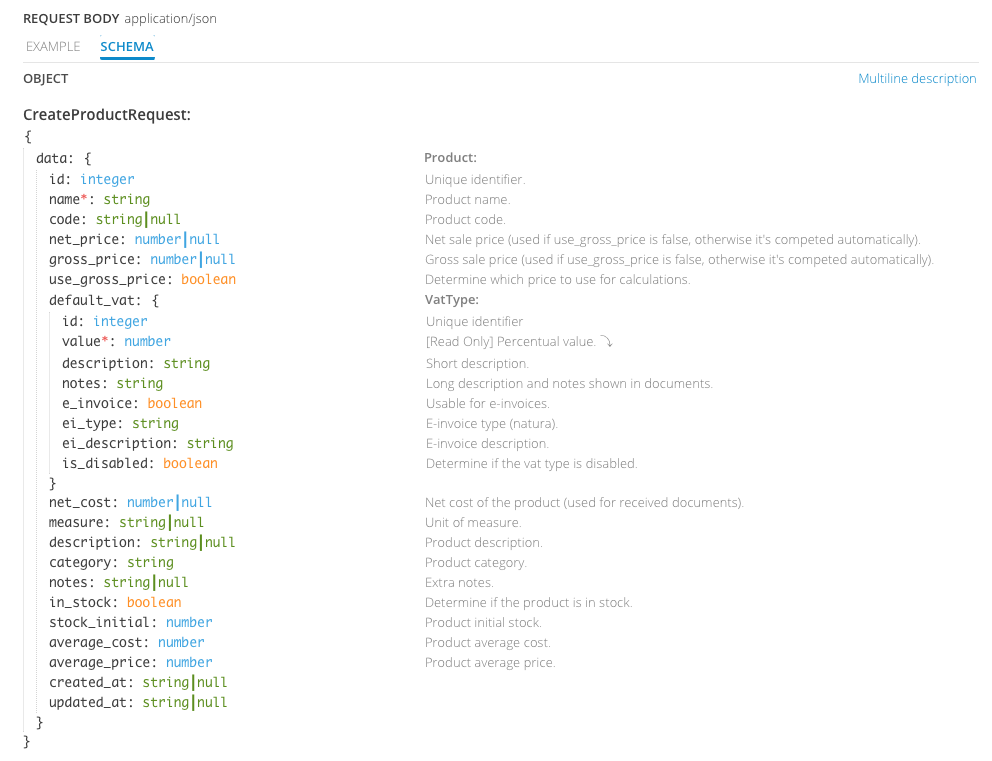
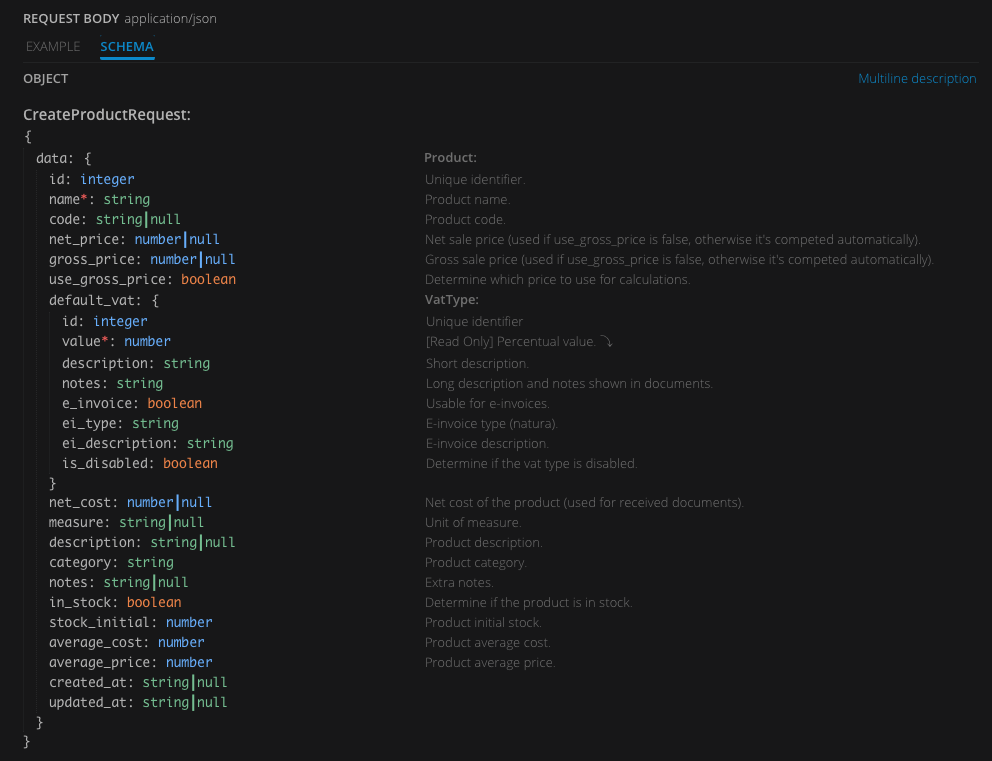
📄 Request & Response Body
For all our POST or PUT methods, you will always need to set a JSON Request Body, that will contain the core of the request. In every section, you will find a prefilled body example that you must modify to make the request work, plus the schema that the request body must respect.
Please, keep in mind that in the majority of the cases, the examples will not work as-they-are, because they contain some invalid example data that were inserted just to show you the format of the request. The most common examples are the identifiers of the resources related to your account. To obtain a successful response, you must modify these parameters according to what are the resources you own.
Every method includes also a Response section, where you'll find an example response in JSON format and the related schema.
When you perform the request, the actual response obtained from the server will be shown on the page, so you'll be able to write the proper code to manage the results of your API calls.
Sometimes you will need to expand the field description to get all the information like allowed values in enums, to do it you will only need to click the Multi-line description placed at the top of the section.
The fields marked with <span style={{color: "red"}}>* are mandatory.