Manual Authentication
Before starting to read this page, we invite you to check if this is the best authentication method for you. Please check the flowchart you can find on the Authentication page before proceeding.
Manual Authentication is an authentication method that lets the user retrieve the token "manually", e.g. using the Fatture in Cloud WebApp. It requires active user collaboration to be applied: specifically, the user needs to generate correctly the Access Token selecting the correct scopes, and then insert it into the application.
This authentication method is suggested only for very specific use cases. Please think carefully if you want to use it.
This implies some drawbacks:
- The User Experience is worse than the other authorization methods.
- The Error Ratio is higher because the user needs to select the scopes needed by the application; in contrast, in the other flows is the application that's indicating the scopes required to work properly.
- The generated token will never expire (but it can be manually revoked by the user).
The use cases suggested for this method are the following:
- Temporary authentication to start testing our APIs fast without implementing more complex flows. For example, manual authentication can be useful while testing with Postman.
- Simple scripts that will be used by a single Fatture in Cloud User (usually the programmer himself) to manage his account (for example for one-time exports or imports of resources).
- When the other flows are not applicable.
✋ Token generation
Technically speaking, to implement this method you need to do nothing to create a new Access Token: this responsibility lies entirely on the User's shoulders 😫. Even so, if your app needs to manage different users you will need to:
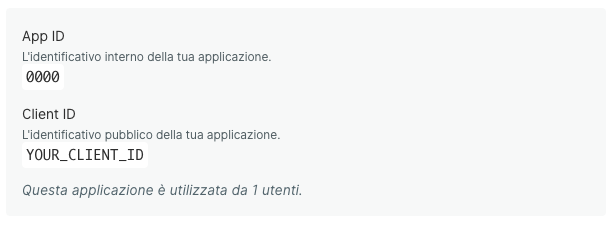
- Provide your Client ID to the User (you can find it on your Application page, in the Sviluppatore section).
- Explain how to generate the Access Token correctly, also indicating the scopes set needed by your app.
- Explain how to insert the Access Token in your app (so you'll need to implement some mechanism to collect and eventually store a string).
The steps that the user must perform are the following:
- Access the Fatture in Cloud web app.
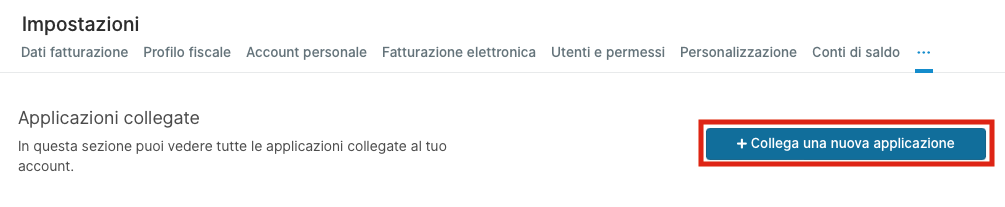
- Access the Settings -> Connected Applications (Impostazioni -> Applicazioni collegate) page.
- Click the Connect a new application (Collega una nuova applicazione) button.
- Insert the Client ID of your application.
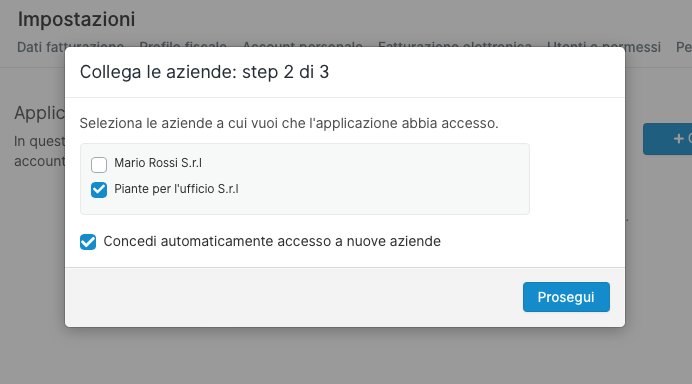
- Select the companies that the application will be able to access from the list.
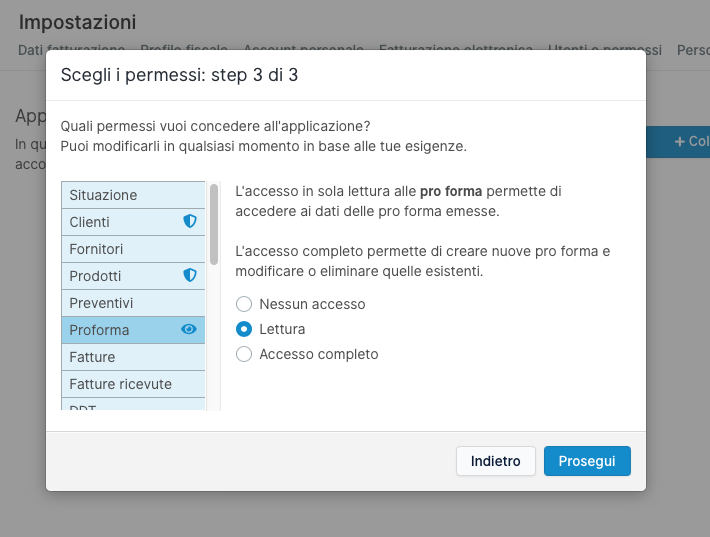
- Select the permissions (e.g. the scope) that will be granted to the application from the list.
- Copy the Access Token and insert it into the application.
Since the User will have the possibility to select the permissions he wants to grant to the application, it is likely that some "Forbidden" error will happen. Also, if a new version of your app needs additional scopes, all your users will need to update the permissions on the Connected Applications page. You should be aware of that and your code should be able to manage this situation correctly.
💼 Find your Company ID
Even if this step is not strictly part of the Authentication process, it is required to be able to use the Company-scoped Methods. Once you obtain the Access Token, you can use the List User Companies method to retrieve the ID of the related Company; please check the Company-scoped Methods page for further info.
✅ Perform an API request
A valid Access Token can be used to authorize requests included in the scopes authorized by the user; to obtain a valid response it is necessary to include the Access Token in your request as an HTTP header.
In the following example, we'll simulate a Get Supplier call. We choose this method because it is relatively easy to understand and it requires the entity.suppliers:r scope to be authorized correctly.
Please, notice that for the purposes of this example we will assume that we already know the parameters required by the request and that we have previously collected a valid Access Token.
- cURL
- HTTP
curl --request GET \
     --url https://api-v2.fattureincloud.it/c/17/entities/suppliers/16 \
     --header 'Accept: application/json'
     --header 'Authorization: Bearer a/eyJ0eXAiOiJKV1QiLCJhbGciOiJIUzI1NiJ9.eyJyZWYiOiJZMElqc1pVWEpUZkxCSkZ3aG5iZmpSYTRJRktYTDk3ayIsImV4cCI6MTU4OTY0MjAzMX0.qn869ICUSS3_hx84ZTToMsB5slWQZjGZXGklSIiBkB4'
GET /c/17/entities/suppliers/16 HTTP/1.1
Host: api-v2.fattureincloud.it
Accept: application/json
Authorization: Bearer a/eyJ0eXAiOiJKV1QiLCJhbGciOiJIUzI1NiJ9.eyJyZWYiOiJZMElqc1pVWEpUZkxCSkZ3aG5iZmpSYTRJRktYTDk3ayIsImV4cCI6MTU4OTY0MjAzMX0.qn869ICUSS3_hx84ZTToMsB5slWQZjGZXGklSIiBkB4
Below you can find some vanilla code examples implementing the same command.
- C#
- Go
- Java
- JavaScript
- PHP
- Python
- Ruby
- TypeScript
// this code uses RestSharp Client: https://restsharp.dev
// you can install it with the following command:
// dotnet add package RestSharp

using System;
using RestSharp;

namespace restclient
{
    class Program
    {
        static void Main(string[] args)
        {
            // for this example we define the token as string, but you should have obtained it in the previous steps
            var token = "a/eyJ0eXAiOiJKV1QiLCJhbGciOiJIUzI1NiJ9.eyJyZWYiOiJZMElqc1pVWEpUZkxCSkZ3aG5iZmpSYTRJRktYTDk3ayIsImV4cCI6MTU4OTY0MjAzMX0.qn869ICUSS3_hx84ZTToMsB5slWQZjGZXGklSIiBkB4";

            // these parameters are usually retrieved through our APIs or stored in a DB
            var companyId = 16;
            var supplierId = 17;

            var url = "https://api-v2.fattureincloud.it/c/" + companyId  + "/entities/suppliers/" + supplierId,;

            var client = new RestClient(url);
            var request = new RestRequest(Method.GET);

            request.AddHeader("authorization", "Bearer " + token);
            IRestResponse response = client.Execute(request);
            Console.Write(response.Content.ToString());
        }
    }
}
package main

import (
	"io/ioutil"
	"log"
	"net/http"
)

func main() {

	// for this example we define the token as string, but you should have obtained it in the previous steps
	token := "Bearer " + "a/eyJ0eXAiOiJKV1QiLCJhbGciOiJIUzI1NiJ9.eyJyZWYiOiJZMElqc1pVWEpUZkxCSkZ3aG5iZmpSYTRJRktYTDk3ayIsImV4cCI6MTU4OTY0MjAzMX0.qn869ICUSS3_hx84ZTToMsB5slWQZjGZXGklSIiBkB4"

	// these parameters are usually retrieved through our APIs or stored in a DB
	companyId := "16"
	supplierId := "17"
	uri := "http://api-v2.local.fattureincloud.it/c/" + companyId + "/entities/suppliers/" + supplierId

	req, _ := http.NewRequest("GET", uri, nil)
	req.Header.Add("Authorization", token)

	client := &http.Client{}
	resp, err := client.Do(req)
	if err != nil {
		log.Println("Error on response.\n[ERROR] -", err)
	}
	defer resp.Body.Close()

	body, err := ioutil.ReadAll(resp.Body)
	if err != nil {
		log.Println("Error while reading the response bytes:", err)
	}
	log.Println(string([]byte(body)))

}
import okhttp3.HttpUrl;
import okhttp3.OkHttpClient;
import okhttp3.Request;
import okhttp3.Response;
import java.io.IOException;
import java.net.URL;

public class Application {
    public static void main(String[] args) throws IOException {

        // for this example we define the token as string, but you should have obtained it in the previous steps
        String token = "a/eyJ0eXAiOiJKV1QiLCJhbGciOiJIUzI1NiJ9.eyJyZWYiOiJZMElqc1pVWEpUZkxCSkZ3aG5iZmpSYTRJRktYTDk3ayIsImV4cCI6MTU4OTY0MjAzMX0.qn869ICUSS3_hx84ZTToMsB5slWQZjGZXGklSIiBkB4";

        // these parameters are usually retrieved through our APIs or stored in a DB
        Integer companyId = 16;
        Integer supplierId = 17;

        URL url = new HttpUrl.Builder()
                .scheme("https")
                .host("api-v2.fattureincloud.it")
                .addPathSegments("c/" + companyId  + "/entities/suppliers/" + supplierId)
                .build().url();

        OkHttpClient client = new OkHttpClient();
        Request request = new Request.Builder()
                .header("Authorization", "Bearer " + token)
                .url(url)
                .build();
        Response response = client.newCall(request).execute();
        System.out.println(response.body().string());
    }
}
var http = require("https");

// for this example we define the token as string, but you should have obtained it in the previous steps
var token =
  "a/eyJ0eXAiOiJKV1QiLCJhbGciOiJIUzI1NiJ9.eyJyZWYiOiJZMElqc1pVWEpUZkxCSkZ3aG5iZmpSYTRJRktYTDk3ayIsImV4cCI6MTU4OTY0MjAzMX0.qn869ICUSS3_hx84ZTToMsB5slWQZjGZXGklSIiBkB4";

// these parameters are usually retrieved through our APIs or stored in a DB
var companyId = 16;
var supplierId = 17;

var options = {
  method: "GET",
  hostname: "api-v2.fattureincloud.it",
  port: null,
  path: "/c/" + companyId + "/entities/suppliers/" + supplierId,
  headers: {
    authorization: "Bearer " + token,
  },
};

var req = http.request(options, function (res) {
  var chunks = [];

  res.on("data", function (chunk) {
    chunks.push(chunk);
  });

  res.on("end", function () {
    var body = Buffer.concat(chunks);
    console.log(body.toString());
  });
});

req.end();
// this code uses Guzzle HTTP Client: https://docs.guzzlephp.org/en/stable/
// and also ext-json
// you can install them with the following command:
// composer require guzzlehttp/guzzle ext-json
use GuzzleHttp\Client;
use GuzzleHttp\Exception\ClientException;
use GuzzleHttp\Psr7;


// for this example we define the token as string, but you should have obtained it in the previous steps
$token = 'a/eyJ0eXAiOiJKV1QiLCJhbGciOiJIUzI1NiJ9.eyJyZWYiOiJZMElqc1pVWEpUZkxCSkZ3aG5iZmpSYTRJRktYTDk3ayIsImV4cCI6MTU4OTY0MjAzMX0.qn869ICUSS3_hx84ZTToMsB5slWQZjGZXGklSIiBkB4';

// these parameters are usually retrieved through our APIs or stored in a DB
$companyId = 17;
$supplierId = 16;

$client = new Client();

$url = "https://api-v2.fattureincloud.it/c/$companyId/entities/suppliers/$supplierId";

try {
  $response = $client->request('GET', $url, [
    'headers' => [
      'Accept' => 'application/json',
      'Authorization' => 'Bearer ' . $token,
    ],
  ]);

    return json_decode((string) $response->getBody());
} catch (ClientException $e) {
    echo Psr7\Message::toString($e->getRequest());
    echo Psr7\Message::toString($e->getResponse());
}
import requests

# for this example we define the token as string, but you should have obtained it in the previous steps
token = "a/eyJ0eXAiOiJKV1QiLCJhbGciOiJIUzI1NiJ9.eyJyZWYiOiJYOGxDaFR4dHVsQkx0cXVVSjNCQlZEME1KOVY0NTl3QiIsImV4cCI6MTYzOTcyODAzM30.A-uMzLDpaEzGRqzUodJfdJPKo8SWMCytWUElQdOEP0c"

# these parameters are usually retrieved through our APIs or stored in a DB
company_id = 16
supplier_id = 17

headers = { 'authorization': "Bearer " + token}
response = requests.get(f"https://api-v2.fattureincloud.it/c/\{company_id\}/entities/suppliers/{supplier_id}", headers=headers)

print(response.json())
require 'uri'
require 'net/http'

# for this example we define the token as string, but you should have obtained it in the previous steps
token = "a/eyJ0eXAiOiJKV1QiLCJhbGciOiJIUzI1NiJ9.eyJyZWYiOiJYOGxDaFR4dHVsQkx0cXVVSjNCQlZEME1KOVY0NTl3QiIsImV4cCI6MTYzOTcyODAzM30.A-uMzLDpaEzGRqzUodJfdJPKo8SWMCytWUElQdOEP0c"

# these parameters are usually retrieved through our APIs or stored in a DB
company_id = 16
supplier_id = 17

uri = URI("https://api-v2.fattureincloud.it/c/#\{company_id\}/entities/suppliers/#{supplier_id}")
headers = { authorization: "Bearer " + token}
res = Net::HTTP.get_response(uri, headers)

puts res.body
// in this example we are using the node-fetch library to make the request
import fetch, { Headers } from "node-fetch";

// for this example we define the token as a string, but you should have obtained it in the previous steps
var token =
  "a/eyJ0eXAiOiJKV1QiLCJhbGciOiJIUzI1NiJ9.eyJyZWYiOiJYOGxDaFR4dHVsQkx0cXVVSjNCQlZEME1KOVY0NTl3QiIsImV4cCI6MTYzOTcyODAzM30.A-uMzLDpaEzGRqzUodJfdJPKo8SWMCytWUElQdOEP0c";

// these parameters are usually retrieved through our APIs or stored in a DB
var companyId = 16;
var supplierId = 17;

var headers = new Headers({
  "Content-Type": "application/json",
  Authorization: "Bearer " + token,
});

var options = {
  method: "GET",
  headers: headers,
};

try {
  var res = await fetch(
    "https://api-v2.fattureincloud.it/c/" +
      companyId +
      "/entities/suppliers" +
      supplierId,
    options
  );
  var json = await res.json();
  console.log(json);
} catch (err) {
  console.log(err);
}
If the Access Token is valid and provided correctly in the header, the response will be a 200 OK. To check the possible error responses, please check the dedicated page.
Please, note that this is exactly the same step applied for the OAuth 2.0 flows. If you want to switch from this method to another, you can reuse this code without having to modify it. You "just" need to add the code to retrieve the access token.
📝 Change token permissions
If you need to change the set of scopes currently associated with your token, you must ask your app users to perform the following simple steps:
- Access the Fatture in Cloud web app.
- Access the Settings -> Connected Applications (Impostazioni -> Applicazioni collegate) page.
- Click the Manage (Gestisci) button next to your App.
- Click the Edit (Modifica) button next to the scopes section.
- Select the new permissions (e.g. the scopes) that must be granted to the application from the list.
At this point, in a short time, the list of scopes associated with your token will be updated; the token itself isn't regenerated, so it isn't necessary to require the user to reload the token to the application.
Please, note that this isn't a step that you can perform automatically. Your user must perform it manually, selecting the required scopes, so the operation is prone to errors in the scopes selection: the user could select the wrong scopes and also remove some previously assigned ones. This means that you must be ready to manage permissions errors, not only related to the new scopes but also the old ones.