Google Sheets Apps Script Quickstart
import Tabs from '@theme/Tabs'; import TabItem from '@theme/TabItem';
In this guide, we'll explain how to use Apps Script to load and create resources with our APIs into Google Sheets.
📖 List Example
In this example, we will load our invoices list using the List Issued Documents method, but you can adapt this guide to using it with the API method you need.
1️⃣ Step one: Create the Apps Script function
In this example, we'll suppose you have to manage just one Company, so we simply inserted its ID directly in the code. If instead, you need to be able to manage multiple companies, you'll need to retrieve the ID of the current company in some way. Check the Company-scoped Methods page for more info.
First, we must select the extensions -> App Script to open the editor:

Then we need to create the listInvoice method and define the menu we'll use to trigger it:
// This function creates a menu tab to execute the listInvoices function
function onOpen() {
  var ui = SpreadsheetApp.getUi();
  ui.createMenu("Fatture in Cloud API")
    .addItem("List invoices", "listInvoices")
    .addToUi();
}
// This function loops between all the pages of the response and pushes the results on the sheet
function listInvoices() {
  var sheet = SpreadsheetApp.getActiveSheet();
  sheet.clear();
  sheet.appendRow([
    "id",
    "type",
    "numeration",
    "subject",
    "visible_subject",
    "amount_net",
    "amount_vat",
    "date",
    "next_due_date",
    "url",
    "client name",
    "client tax_code",
    "client vat_number",
  ]);
  var url = "https://api-v2.fattureincloud.it";
  var endpoint = "/c/{company_id}/issued_documents";
  var headers = {
    "Content-Type": "application/json",
    Authorization: "Bearer YOUR_ACCESS_TOKEN",
  };

  var options = {
    method: "get",
    headers: headers,
  };

  var queryParams = ["type=" + "invoice"];
  var pageKey = "page";
  var pageNum = 1;
  var nextPageUrl;
  var data = {},
    output = [];
  do {
    var currentUrl = url + endpoint + "?" + queryParams.join("&");
    currentUrl += "&" + pageKey + "=" + pageNum;

    var response = UrlFetchApp.fetch(currentUrl, options);
    data = JSON.parse(response.getContentText());
    var invoices = data.data;
    for (const index in invoices) {
      sheet.appendRow([
        invoices[index].id,
        invoices[index].type,
        invoices[index].numeration,
        invoices[index].subject,
        invoices[index].visible_subject,
        invoices[index].amount_net,
        invoices[index].amount_vat,
        invoices[index].date,
        invoices[index].next_due_date,
        invoices[index].url,
        invoices[index].entity.name,
        invoices[index].entity.tax_code,
        invoices[index].entity.vat_number,
      ]);
    }
    pageNum++;
    nextPageUrl = data.next_page_url;
  } while (nextPageUrl);
}
As you can see we are calling the List Issued Documents method, accessible to the following URL:
https://api-v2.fattureincloud.it/c/\{company_id\}/issued_documents
additionally, it requires defining some parameters as Query String (e.g. the "?type=invoice" part), but you can substitute it with the endpoint of the method you want. Please, make sure to replace the {company_id} placeholder with your company ID.
Our APIs also require authentication, so we need to set the Authorization header. You just need to replace the "YOURACCESS_TOKEN" placeholder with your actual _Access Token; you can obtain a valid one following this procedure.
2️⃣ Step Two: Try it!
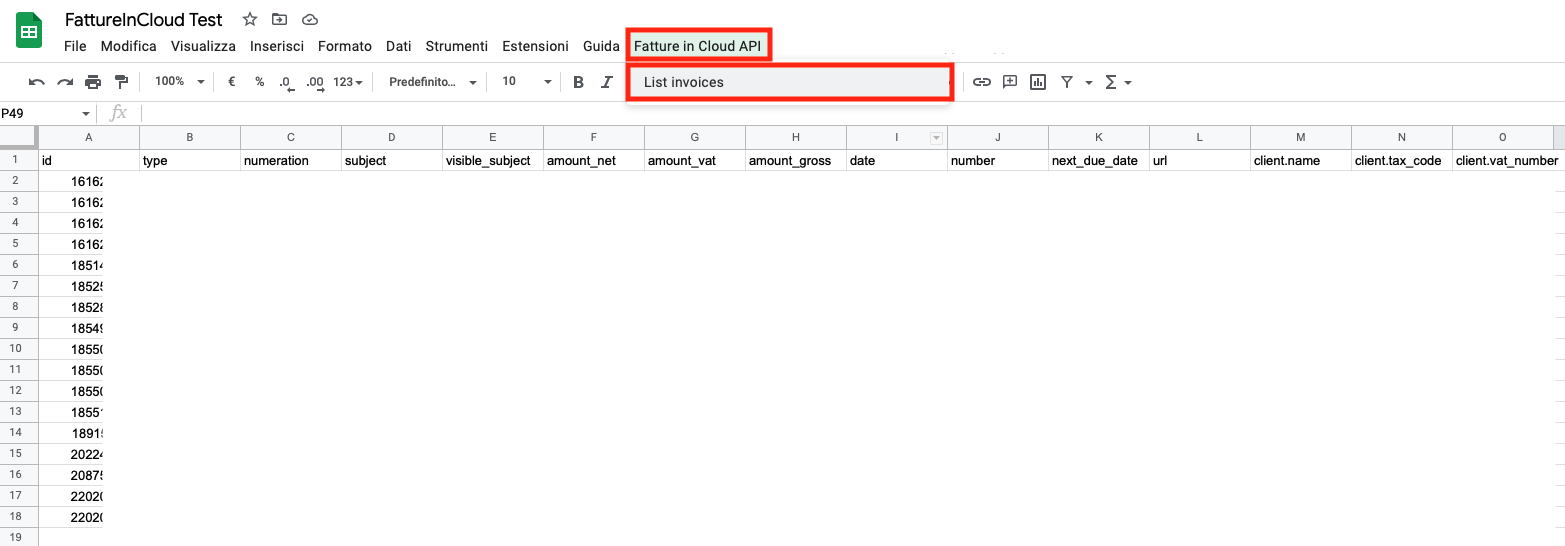
If you inserted the connection parameters correctly, you can now click on the list invoices button that just appeared in your sheet's menu and see the results:

📖 Create Example
In this example, we will create an invoice using the Create Issued Document method.
1️⃣ Step one: Edit the Apps Script functions
If you followed the list example you can now come back to your editor to implement also the invoice creation.
First of all, we need to create a simple form for the inputs, so create the Page.html file and paste in the following code:
<!DOCTYPE html>
<html>
  <head>
    <base target="_top" />
  </head>
  <body>
    <center>
      <input
        type="text"
        id="clientName"
        placeholder="Client Name"
        style="font-size:20px !important;"
      />
      <br /><br />
      <input
        type="text"
        id="clientVatNumber"
        placeholder="Client Vat Number"
        style="font-size:20px !important;"
      />
      <br /><br />
      <input
        type="text"
        id="amountNet"
        placeholder="Amount Net"
        style="font-size:20px !important;"
      />
      <br /><br />
      <input
        type="text"
        id="visibleSubject"
        placeholder="Subject"
        style="font-size:20px !important;"
      />
      <br /><br />
      <button
        onclick="google.script.run.createInvoice(document.getElementById('clientName').value, document.getElementById('clientVatNumber').value, document.getElementById('amountNet').value, document.getElementById('visibleSubject').value)"
        style="font-size:20px !important;"
      >
        Create
      </button>
    </center>
  </body>
</html>
As you can see, we put only a few fields to exemplify the procedure; of course, you can add all the fields you need.
The next step is to modify the menu and add some other functions (the showCreateInvoiceDialog will open the creation form, while the createInvoice will contact our APIs):
// We edit this function to add the new Create invoice button
function onOpen() {
  var ui = SpreadsheetApp.getUi();
  ui.createMenu("Fatture in Cloud API")
    .addItem("List invoices", "listInvoices")
    .addItem("Create invoice", "showCreateInvoiceDialog")
    .addToUi();
}
// This function prompts the html page previously created
function showCreateInvoiceDialog() {
  var html = HtmlService.createHtmlOutputFromFile("Page")
    .setWidth(400)
    .setHeight(300);
  SpreadsheetApp.getUi().showModalDialog(html, "Create Invoice");
}
// This function makes the actual API call to create the invoice
function createInvoice(clientName, clientVatNumber, amountNet, subject) {
    var url = "https://api-v2.fattureincloud.it";
    var endpoint = "/c/\{company_id\}/issued_documents";
    var headers = {
        "Content-Type": "application/json",
        "Authorization": "Bearer YOUR_ACCESS_TOKEN"
    };

    var body = {
        data: {
            type: "invoice",
            amount_net: amountNet,
            visible_subject: subject,
            entity: {
                name: clientName,
                vart_number: clientVatNumber
            }
        }
    }
    var options = {
        "method": "post",
        "headers": headers,
        "payload": JSON.stringify(body)
    };

    try {
        var response = UrlFetchApp.fetch(url + endpoint, options);
        data = JSON.parse(response.getContentText());
        SpreadsheetApp.getUi().alert("Invoice created succesfully with id: " + data.data.id)

    } catch (e) {
        SpreadsheetApp.getUi().alert(e.message)
    }
Remember to replace the placeholders as explained in the list example.
2️⃣ Step Two: Try it!
Nou can now click on the create invoice button that just appeared in your sheet's menu:

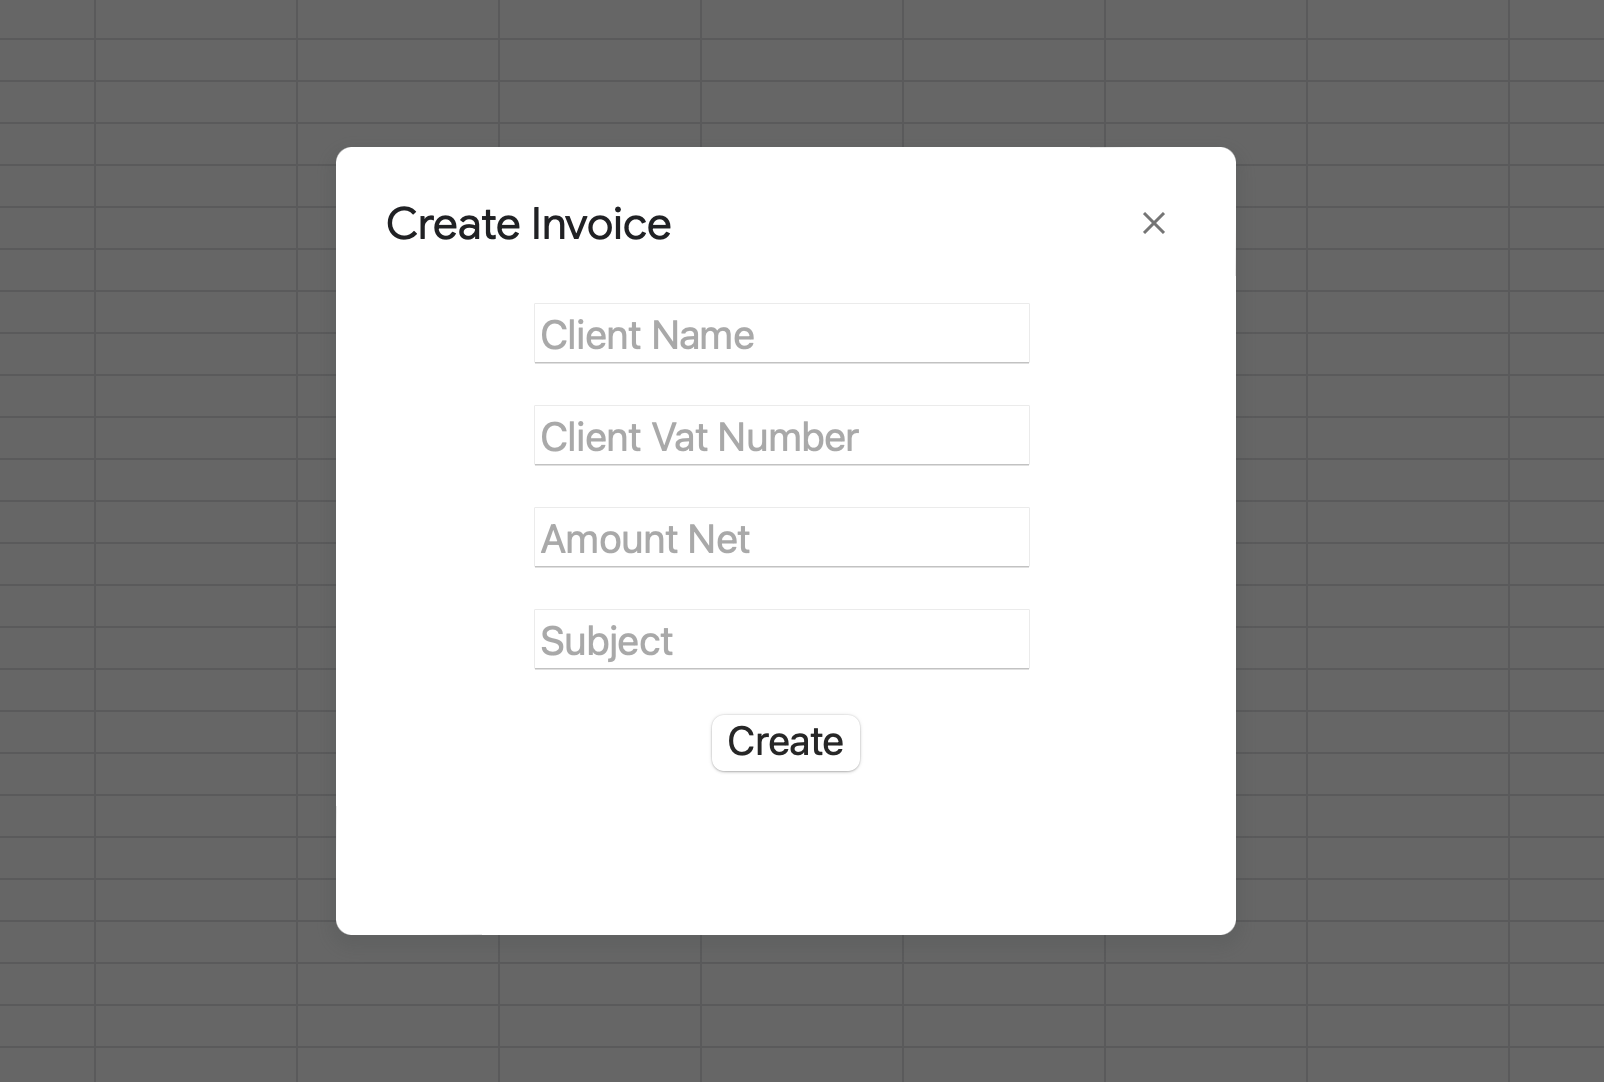
This will show you the HTML page we defined:

If you click on the "Create" button you'll trigger the invoice creation. You'll be able to see the results using the List Invoices menu one more time.
📚 Google Apps Script Documentation
Here you can find some additional resources: