Windows Form Quickstart
Following the steps described on this page, you'll create a simple Windows Form App integrated with Fatture in Cloud.
If you want to download the complete working example you can find it here.
0️⃣ Prerequisites
In this guide, we assume that these prerequisites are met:
- .NET SDK installed
- A Fatture in Cloud account.
- A private app using the Manual Authentication
ℹ️ Github repo!
If you want to download the complete project we have it here, we strongly suggest that you clone this project to follow this guide.
1️⃣ Step One: Create a Windows Form app
The first step is to create a Windows Form project in Visual Studio, in this tutorial we are making a simple app that does two things:
2️⃣ Step Two: Put the components in the Form
This form is pretty simple:
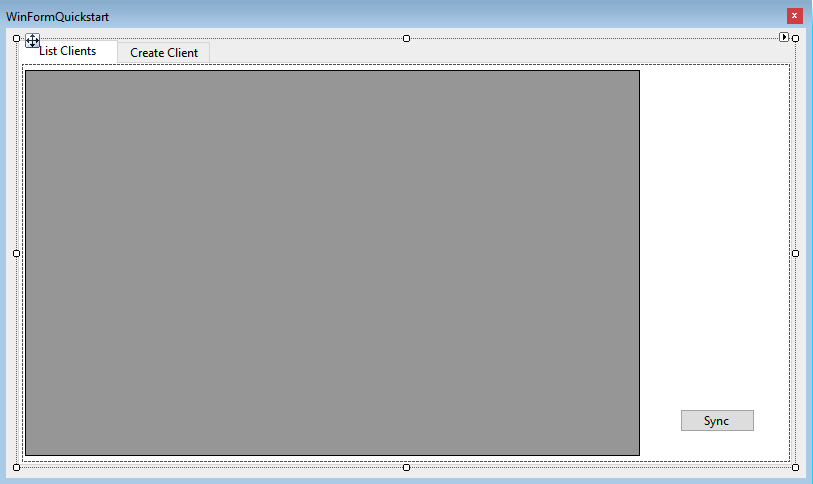
Components list:
- TabControl tabControl1: we have a TabControl with 2 tabs, one for the list clients and one for the create client
inside the first tab we have:
- DataGridView dataGridView1: this shows all the clients linked to the company
- Button syncButton: it calls the method that populates the data grid
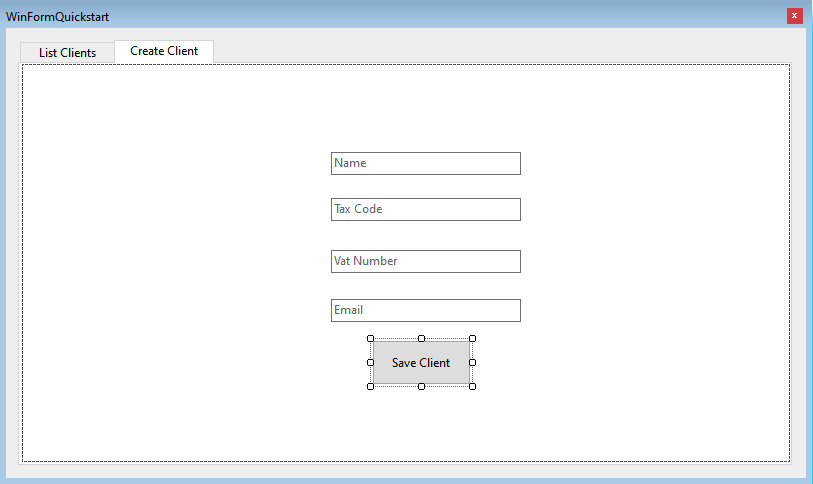
inside the second tab we have:
- TextBox clientNameTextBox: input for the client name
- TextBox clientTaxCodeTextBox: input for the client tax code
- TextBox clientVatNumberTextBox: input for the client vat number
- TextBox clientEmailTextBox: input for the client email
- Button saveClient: it calls the method that creates the client
3️⃣ The actual code
In this example, we'll suppose you have to manage just one Company, so we simply inserted its ID directly in the code. If instead, you need to be able to manage multiple companies, you'll need to retrieve the ID of the current company in some way. Check the Company-scoped Methods page for more info.
The actual code behind the Form is very simple too:
using It.FattureInCloud.Sdk.Api;
using It.FattureInCloud.Sdk.Client;
using It.FattureInCloud.Sdk.Model;
using System;
using System.Windows.Forms;
namespace WinFormsQuickstart
{
public partial class Form : System.Windows.Forms.Form
{
ClientsApi clientsApi;
int companyId = 12345;
public Form()
{
InitializeComponent();
Configuration config = new Configuration();
// IMPORTANT: the access token file must be saved in a secure environment
// like a db or the AppConfig
config.AccessToken = "YOUR_ACCESS_TOKEN";
clientsApi = new ClientsApi(config);
}
private void syncButton_Click(object sender, EventArgs e)
{
try
{
dataGridView1.Rows.Clear();
dataGridView1.Columns.Clear();
dataGridView1.Refresh();
dataGridView1.Columns.Add("Id", "Id");
dataGridView1.Columns.Add("Name", "Name");
dataGridView1.Columns.Add("VatNumber", "Vat Number");
dataGridView1.Columns.Add("TaxCode", "Tax Code");
dataGridView1.Columns.Add("Country", "Country");
retrieveAllClients();
}
catch (Exception ex)
{
MessageBox.Show(ex.Message);
}
}
private void retrieveAllClients(int page = 1)
{
var result = clientsApi.ListClientsWithHttpInfo(companyId, page: page);
result.Data.Data.ForEach(client =>
{
dataGridView1.Rows.Add(
new string[]
{
client.Id.ToString(),
client.Name,
client.VatNumber,
client.TaxCode,
client.Country
}
);
});
if (result.Data.NextPageUrl != null) retrieveAllClients(++page);
}
private void saveClient_Click(object sender, EventArgs e)
{
var newClient = new CreateClientRequest(
data: new ModelClient(
name: clientNameTextBox.Text,
taxCode: clientTaxCodeTextBox.Text,
vatNumber: clientVatNumberTextBox.Text,
email: clientEmailTextBox.Text
)
);
try
{
var result = clientsApi.CreateClient(companyId, newClient);
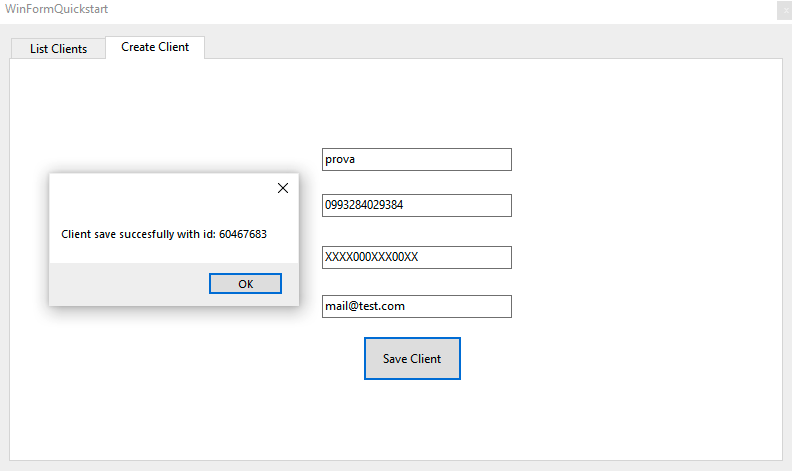
MessageBox.Show("Client save succesfully with id: " + result.Data.Id.ToString());
clientNameTextBox.Text = String.Empty;
clientTaxCodeTextBox.Text = String.Empty;
clientVatNumberTextBox.Text = String.Empty;
clientEmailTextBox.Text = String.Empty;
}
catch (Exception ex)
{
MessageBox.Show(ex.Message);
}
}
}
}
In this QuickStart, as you can see the access token is hard coded, this is only for educational purposes, the OAuth access token and refresh token are sensitive data and should be saved securely on your database or in the AppConfig. Also, never share your Client Secret with third-party actors, or publish it on your frontend!
The main methods are two:
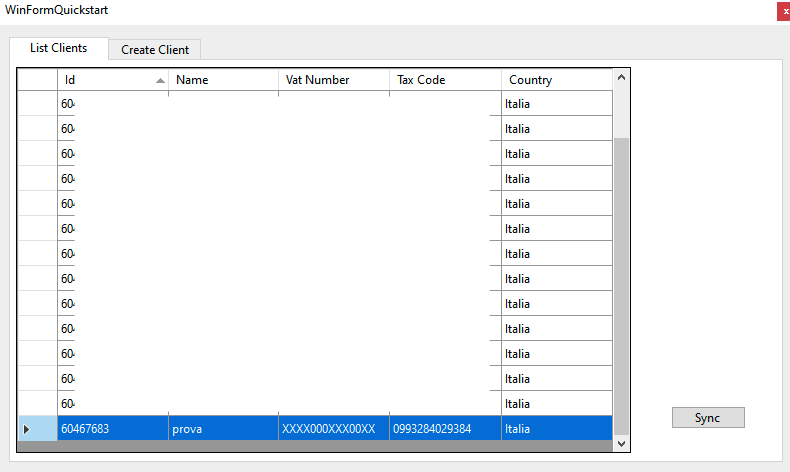
- syncButton_Click: retrieves all the clients looping thru the pages of the paginated response and shows them into the DataGrid
- saveClient_Click: creates the client with the params specified in the TexBoxes
3️⃣ Step Three: Run the sample
Now your Form should work like a charm.
Let's create a new client:
and now we are going to see it by syncing in the list clients tab: